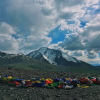
The route for Borasu Pass, a trail which we recently explored, goes through one of the most popular treks into a more virgin land not touched by many. Located along the border with Tibet, the trail for this high mountain pass takes us through Har ki Doon valley which is gorgeous to say the least. While we are still recuperating from the beauty bestowed upon us by Har ki Dun, we have learned that by continuing on the trail beyond this point, we are only in for bigger surprises.
As one of the lesser explored trails in the region, Borasu Pass is one off-beat trek that sure leaves us beat and gasping for air. To say that the variety of landscape offered by this ancient trade route between Uttarakhand and Himachal, left us awestruck, would be an understatement. The high-altitude pass, which is barely explored lies at an elevation of 5,200M and provides for the best views but will make you sweat for them! Given that this is a fresh trek not attempted by many, the route has no marked trail which is our favourite part about the trek since it gave us a free rein to explore.
This article discusses the difficulty level of Borasu Pass, the gear and skills you require to make a successful ascent up its rocky slopes and some of the challenges you are likely to encounter when you embark on this journey from where there is no looking back.
Difficulty Level of the Trek:
Borasu Pass is a level 5 trek on the Bikat Rating Scale.
About the BRS: The Bikat Rating Scale rates the difficulty level of all treks and expeditions in our portfolio after taking into account their geographical and climatic conditions.
According to this scale, if you are a beginner who is unsure of your fitness level and don’t know what to expect on a trek, a trek rated one will be a good place to start.
If you liked your very first trekking experience and are looking to test your limits next, the treks rated 2 or 3 will do the job for you.
A beginner who is sure of their fitness level on the other hand is welcome to skip the first two levels and directly start with one of the treks rated 3.
From 4 onwards, the rules change a little. It is mandatory to have trekking experience of the previous level to participate in the next level.
The Trails of Borasu Pass:
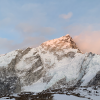
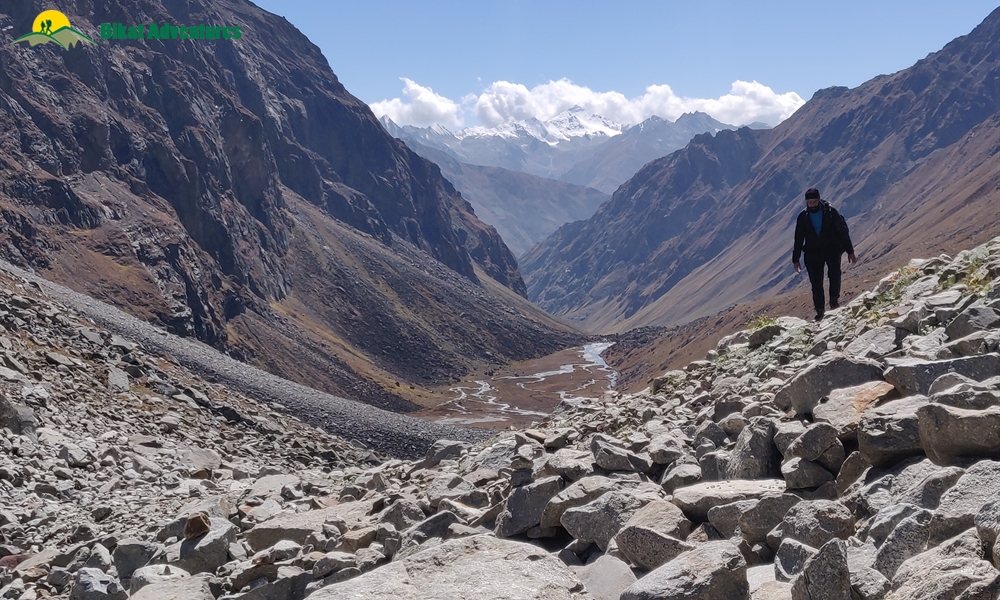
A stunning mix of green meadows and vast fields of snow, packed with jumpy rivers and solemn glaciers, Borasu Pass is an easy trek made extremely difficult by its treacherous terrain.
It is a difficult climb. The long distances between camps, steep narrow ridges and its heavily bouldered terrain with patches of glaciers full of open and hidden crevasses and glacial moraine add to the drama of the trail, making it a strenuous affair. Its steep ascends and descends and the high altitude can get technical. Hence we believe that the trail demands prior experience in the Himalayas along with some specific skills. As a learning-based organization, we will be providing you with all the necessary equipment and training all throughout the trek, so there is absolutely no need to worry. Nonetheless, it helps to know the challenges you are likely to encounter if you decide to undertake this journey. Let us help acquaint you to some exciting difficulties which make the trek challenging as well as fun!
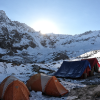
1) Getting to the Trail Head:
If you live away from the North of India, travelling to the Himalayas comes with an enormous cost in terms of time and money. Access to Borasu Pass is an investment in terms of time required to get to its base. The trailhead, Sankri, is not directly accessible by train or air travel. This means it takes an entire day to reach Sankri from the closest city (Dehradun or Rishikesh).
2) Acclimatization:
If you are starting your journey from Dehradun, be prepared to gain quite a bit of altitude (430 M to 1,890 M) on the first day. Since we are moving upwards fairly quickly, acclimatization is crucial to completion of the trek and a safe return.
The weather on the trail of Borasu Pass also has a way of surprising you. With its sudden twists, you never know when you will be hit by the next snow storm, white-out or torrential rains - which makes the trek thrilling while also, adding to its level of difficulty. This constantly changing weather- sudden fog, snow storms and whiteouts, especially on the upper reaches of the pass - make adapting to newer heights a tricky business. Be sure to follow all the acclimatization rules as instructed by the trek leader to eliminate all possibility of altitude-related health hazards so as to facilitate your body to get to newer heights with relative ease. Some of the things to remember are:
1) Proper hydration: Keep drinking water, in small doses, all throughout the day
2) Layering up: Always have proper clothing best suited for the environment
3) Nutrition: The cold and altitude have a way of killing your appetite. Nonetheless, DO NOT skip any meals!
3) Long Days:
The days on the trail of Borasu Pass, especially day 2, day 3, day 6 and day 7, are extremely long. We will be covering long distances on these days. Since these long days cannot be broken further down into smaller distances for the lack of camping sites suitable for spending the night, these days especially prove to be very physically demanding. The difficulty of the terrain adds to the overall challenge. On day 3, we are also gaining a fair bit of altitude (1,250M), making things a bit tougher.
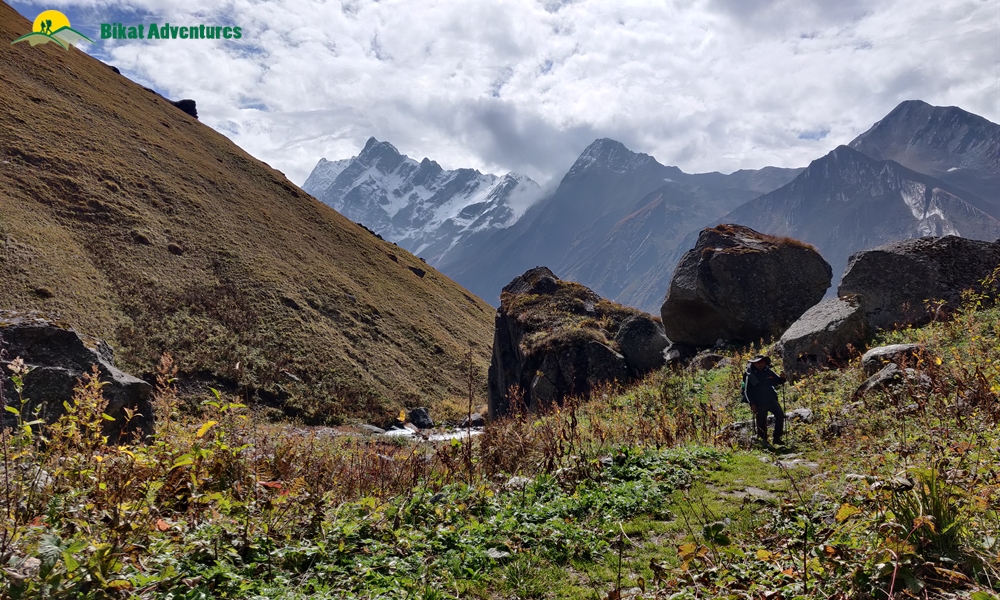
Although the overall difficulty of the trek is high, it still remains manageable given that, except for day 3, the trail allows for a more gradual gain in height as compared to some other difficult treks. The difficulty of the trek is well divided – on days when we are gaining a lot of altitude, the terrain remains fairly easy. As opposed to that when the difficulty of the terrain goes up, the gain in height on those days is convenient.
4) Trying terrain:
If you like your treks 'on the rocks', Borasu Pass is for you! The trail thick with massive boulders keeps you cold the entire time and seasons the landscape to give you a deeper flavour of the geography.
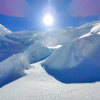
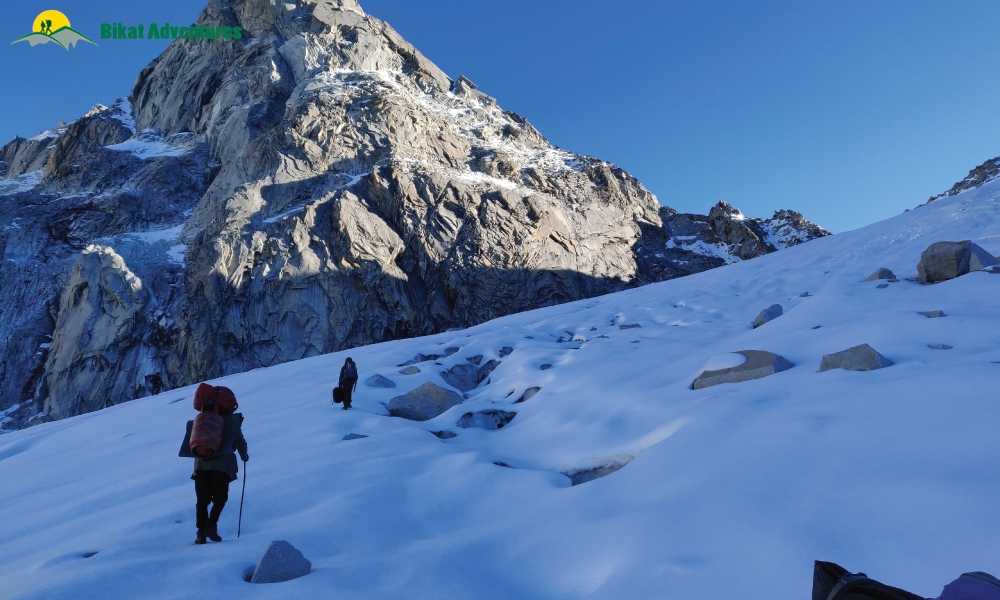
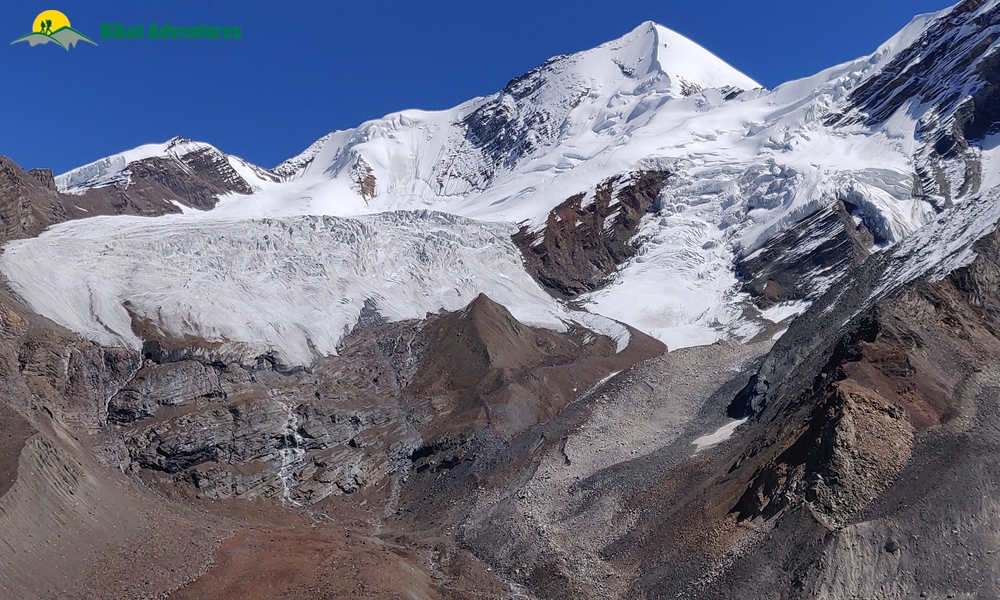
With its heavily bouldered terrain, vast fields of snow, no escape from kilometers of scree and moraine, Borasu Pass is an easy trek made extremely difficult by its treacherous terrain.
5) Pass Day:
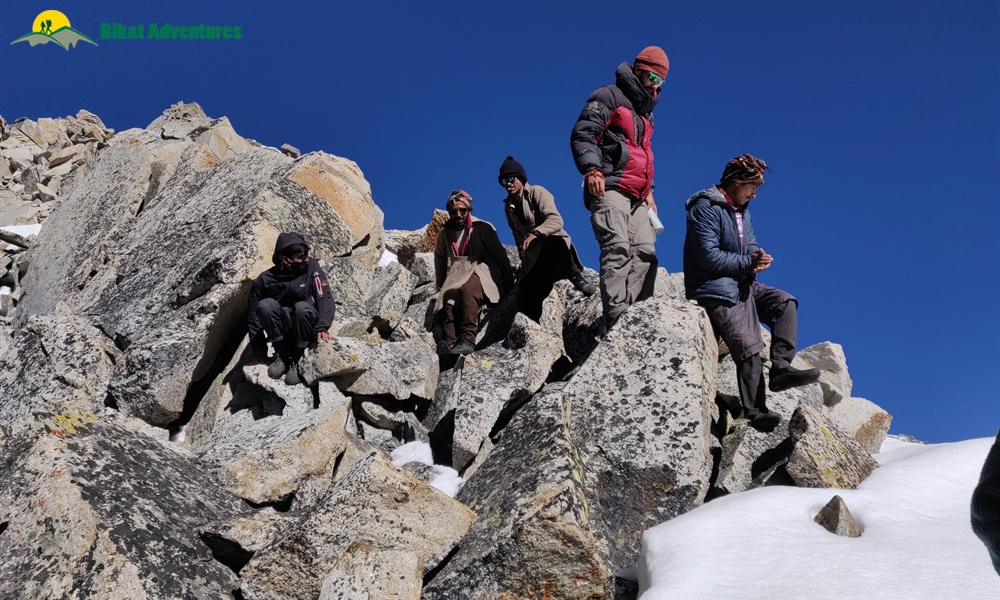
Day 7 is when we cross the pass over to the other side. As would be expected, it is one long day which requires heaps of skill and endurance to cross, especially with the terrain and the weather at that altitude already doing their bit to slow you down. With 500M of ascent and 700M of descent in store for the day, the climb starts early – way before the sun starts its chase of the high peaks in the range. An hour into the steep, heavily bouldered climb, you will reach the base of the glacier where you will gear up – put on your crampons/ microspikes. The slope of the glacier is not more than 30 degrees as it starts but very quickly turns into 70 degrees with alternating rock and snow patches a little further up. The last bit up to the pass is almost vertical and, although short, can feel a little intimidating.
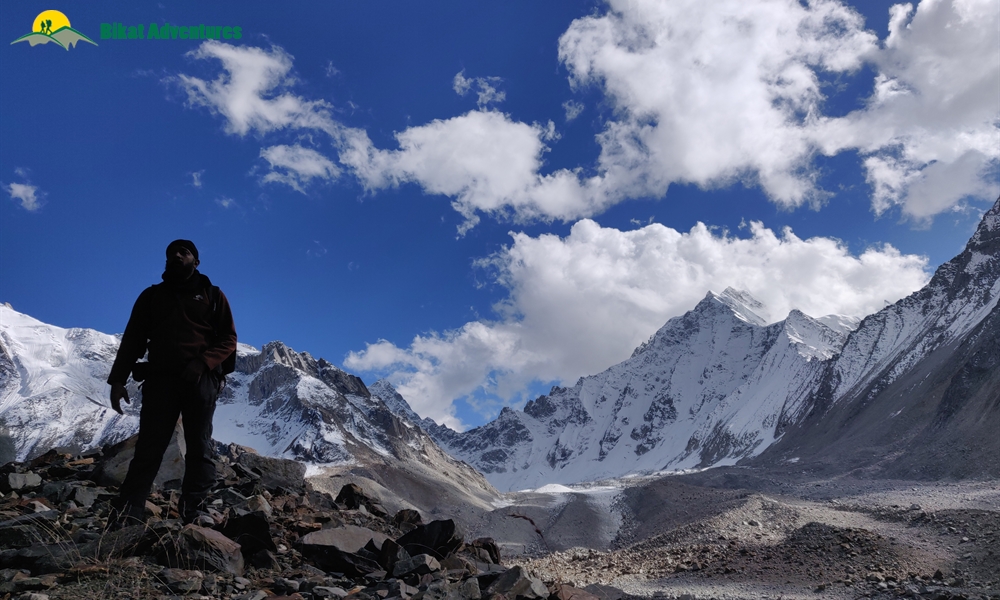
However, the ascent is not the major challenge for the day. You will reach the pass in less than 3 hours. The view from the top which lies at the daunting altitude of 5,200M is mesmerizing. Snow covered peaks with browns and whites playing chase with each other form peculiar patterns on the high mountains all around. After a small prayer on the pass, we start the difficult part of the journey – the long and arduous descent. The first bit itself looks like a direct drop and will require roping up or fixing ropes to safely come down. After the initial section, which is a 75 degree slope and takes close to 40 minutes to descend, we hit a large patch of almost flat snow which slowly descends downwards. This section has a lot of open and hidden crevasses, however, and needs to be crossed with caution. It also has sections with steep slopes on one side which could take you straight down, in case of a single slip. By the end of 45 minutes on this terrain, you would have already descended 300M and reached the end of the snow section. What we found especially daunting was what’s coming next, however – hours of sharp ascend and descend on boulders as big as dreams. The need to exercise caution on every tiny step forward, to avoid the gaps between these boulders, is extremely tiring. The next section which brings you down by 200M looks like a small distance to cover but takes close to an hour and a half. It is a steep descend with no specific trail and requires navigating massive boulders.
Once at the base of this section, we will walk for 45 minutes on the rocky ground to make it to the mountains on the other side of the glacial bed. We need to catch the ridge of the mountain you see ahead but in order to do that, we have to climb up a steep slope of scree and loose rocks. This section which will take not more than 50 steps to climb might make you think 50 times before you do it. Once on the ridge, the walk is pretty straightforward, although it is on a narrow trail with loose rocks, so you might want to be extra careful – a small misstep could be fatal.
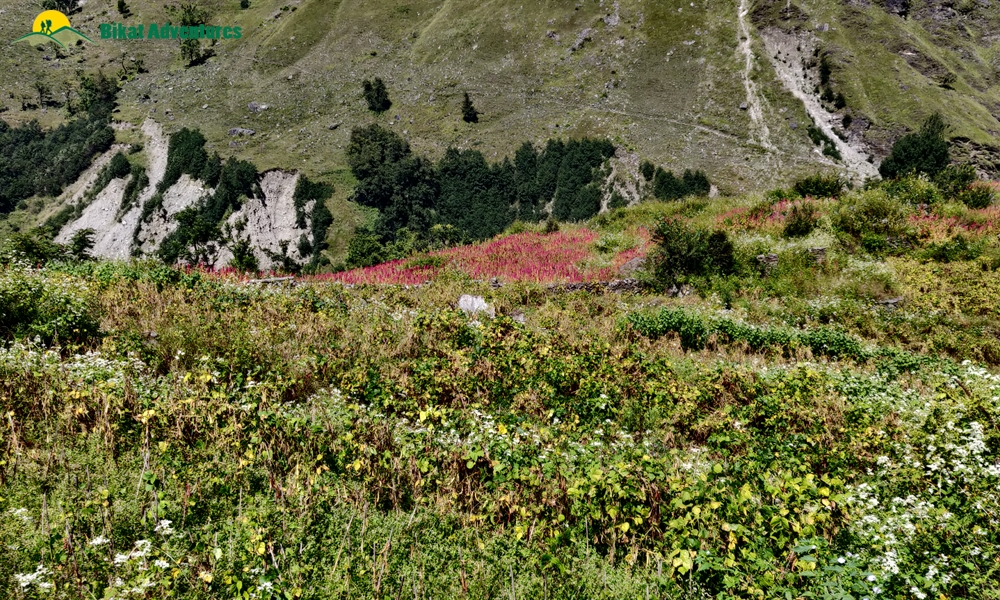
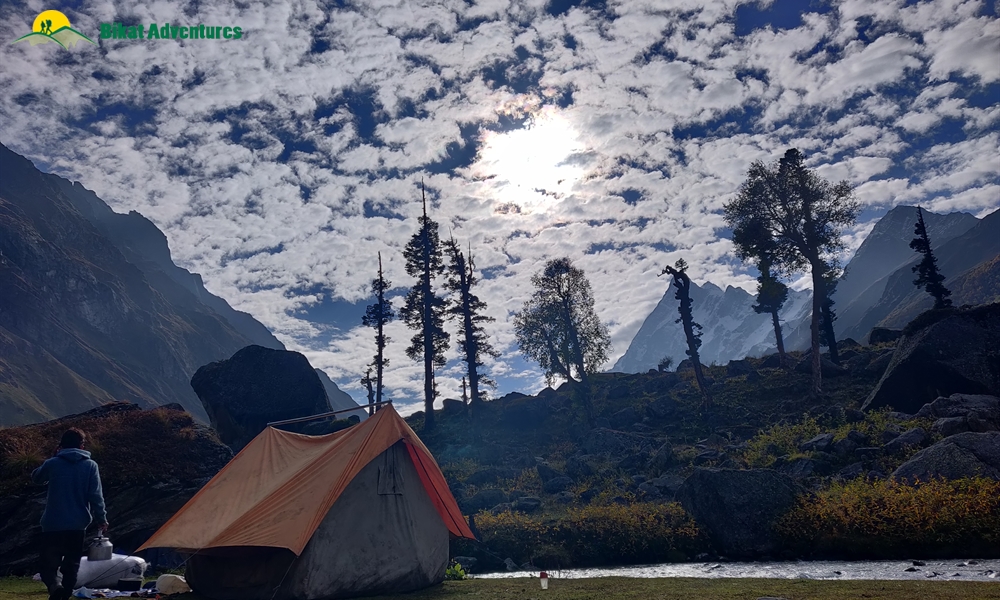
After walking the ridge and welcoming colour back into our field of vision for 45 minutes, we descend to now take the lower ridge. Flowers now get added to the mix of dry grass and life is starting to thrive in this terrain. The day is almost 10-11 hours long but it is a relief to make it down to relatively warmer lands although the temperature here is likely to be low too - do not be surprised if you wake up to a sheet of ice keeping you from getting to the water of the stream, like it did us!
6) Technical Bits:
Although not many, the few technical sections on the trail are extremely demanding. These sections ask for a fair bit of experience in similar terrain and altitude to get through them with considerable ease. Since clear weather windows on high-altitude are very limited, time is also a big factor is getting through each day with safety. This is where skill and experience are most vital since time here is a limited resource and cannot be spared.
Some of the most technical sections on the trail are:
1) Scree and Moraine: Getting through the vast sections of scree and moraine. These tend to get especially tricky when a high gradient slope is added to the mix. These kinds of terrains are slippery and do not provide for the best footing. The constant shifting of weight in addition to having to exercise extreme caution all the way, makes these parts of the climb very tiring. They can be navigated better with proper knowledge of skills and techniques known to work best in these regions.
2) After the pass: When you are standing on top of the pass and figuring out a way to descend on the other side, it wouldn’t be surprising if you couldn’t find a way down. From the pass, there is a massive and steep drop of close to 50 meters to get to a gradient that seems possible to walk on. This section requires the use of fixed ropes, or roping up procedures to cross. It may also seem a bit daunting but worry not, mountaineering equipment are our best friends just for this reason!
3) Steep drops: The narrow ridges with steep drops on both sides can seem intimidating especially in snow where it is anyway difficult to find a firm footing. These sections which are already slippery to walk on, knowing that one wrong step could lead you to slide all the way down is enough to increase your heart rate.
7) Not a Beginner’s Trek:
For all the reasons mentioned above, we would recommend not to choose this route as your introduction to high-altitude or the Himalayas. For the level of experience it demands for its weather, terrain and skill, this trek should only be considered by experienced trekkers for it to be a gratifying experience.
GEAR REQUIRED FOR BORASU PASS:
While we will be providing most of the technical equipment needed for the trek (tents, sleeping bags, crampons/micro spikes), there is some basic gear you will need from your end to get through your trek comfortably.
Some of the things you will need are:
1) A sturdy, lightweight backpack: A good backpack which sits comfortably on your back without putting too much pressure on it can be the deciding factor between making it to the summit or not. Good, however, is not a synonym for expensive.
One of our founders, Pankaj, purchased a non-branded pack for INR 1100 in 2010 and the pack continues to work just fine for him even today. In the article linked below, he shares some helpful tips on what to look for when choosing a trekking backpack.
2) Comfortable trekking shoes: Happy feet equal a happy trek. Conventional sports shoes don’t suit trekking trails. We recommend wearing high ankle shoes with sturdy soles. These not only provide better support but also reduce the possibility of injuries while trekking through different kinds of terrain. In case, you need help with a list of deciding factors that make for good trekking shoes, please refer to the article below.
How to choose a good pair of hiking shoes
3) Right Clothing: Any high-altitude trek requires specific kinds of clothing. It should be warm but light weight. It should also be such that it is easily packaged. On high-altitude treks like Borasu Pass, we usually employ the layering method where you put on multiple layers of clothing instead of one very heavy, thick jacket. This is for two reasons:
a) The weather in Himalayan regions is unpredictable and changes very quickly. Layering gives you the freedom to adapt to that accordingly where you are not left feeling too hot or too cold.
b) These are easy to carry and are packing-friendly.
4) Right Sunglasses: When you know you are going to be in and around snow or in any high-altitude location where the sun is harsh, you might want to carry a good pair of sunglasses. A lack of these could prove to be fatal. The article below can help you pick out just the right pair.
How to pick high-altitude UV protection glasses?
SKILLS REQUIRED FOR BORASU PASS:
Bikat Adventures is primarily an adventure learning organization. This means our key objective is not just to help trekkers complete their treks but also to ensure they pick up some valuable lessons and skills in trekking along the way.
To achieve this, we have created learning modules and paired them to different levels on the Bikat Rating Scale.
These modules are taught real-time on the trails by our trek leaders.
The following are some skills that are likely to come in handy on a trek like Borasu Pass.
While you will have all the assistance you need on the trek from our capable trek leaders and guides, we suggest browsing through the articles below to get an idea of what is involved.
1) Ascending Descending on Trails
Borasu Pass is full of steep ascents and equally steep descents. While ascending and descending on a rocky terrain is difficult, achieving this on icy slopes is trickier, especially when there are massive boulders with massive gaps in between, to be navigated. A set of simple techniques can help you navigate rocky as well as icy landscapes with considerable ease while also reducing chances of injuries and stress to specific body parts. The guide linked below shares some useful tips on how to ascend and descend on trails.
Ascending and Descending on Trails
Here is an additional article for some more in-depth information specific to an icy terrain.
Ice-craft Basics: Glacier Travel
2) Packing Your Rucksack
Given how unpredictable the weather gets on Borasu Pass, you are likely to keep changing your layering frequently along the way. Also, due to the vast difference in day temperature and that at night, you most probably will spend a lot of time packing and re-packing your sack.
Accessing your stuff can get a bit messy and confusing during this process.
A sack packed right can facilitate your trekking while incorrect packing can make even an easy trail seem difficult. Worry not, we are here to help. The article linked below shares some useful guidelines you can follow to pack efficiently.
3) How to Pitch a Tent
Our trek leaders will be guiding you on how to pitch a tent during the trek. Nevertheless, we are linking the article below for anyone who might be interested in reading about it.
4) Layering Basics
Layering appropriately to protect you from the cold is essential. The article linked below will give you a fair idea of the winter layers you will need and guide you on how to layer up at campsites and while hiking.
5) Understanding Equipment
Like we said before, Borasu Pass is rife with sharp ascents and equally sharp descents in an assortment of landscapes. This, along with its peculiar terrain and environment require you to use some mountaineering equipment. The articles below will acquaint you to a few of these and help you understand how to use them as well as how they can facilitate your climb.
- How to use Microspikes?
We hope this article answers all the questions you may have about Borasu Pass. In case you need further assistance/information with something, please feel free to reach out to us. We are only a phone call away.


")