How to avoid shoe bite and treat blisters during hiking!
Foot blisters on the trek can make your trekking experience from awesome to awful in no time. The rough terrain and trails take a toll on your feet resulting in the blisters. Add dirt, sweat, and abrasion to it, and it makes the perfect recipe for blister formation.
What are blisters and what causes them to form?
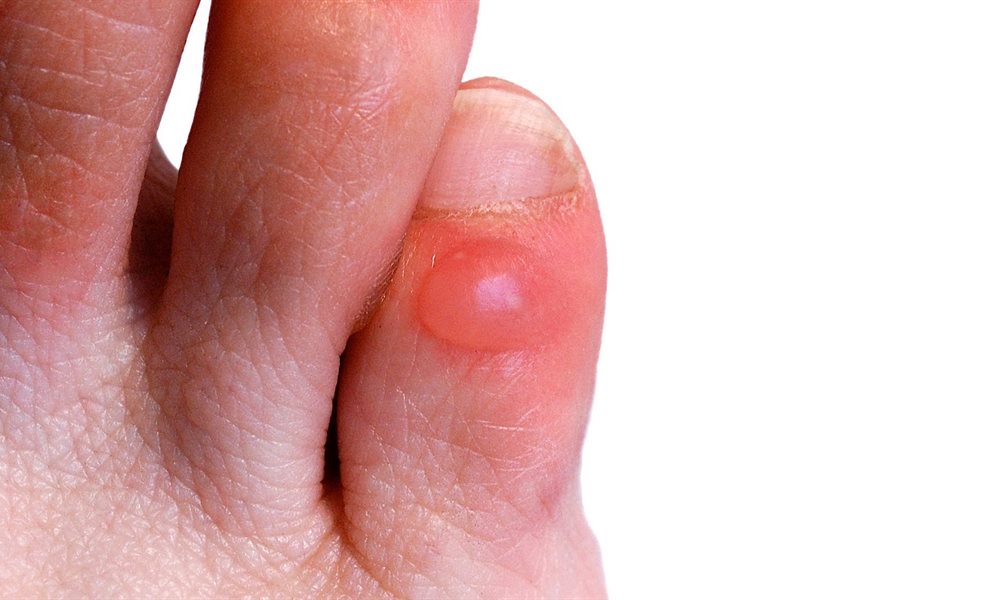
Blisters are small pockets of fluid which are formed on the upper layer of skin due to rubbing under the skin.
The main reason for forming blisters from hiking is friction. When you walk for long hours on the trek, your feet become hot and sweaty. Your socks stick to your sweaty feet and begin to rub against the inside of your shoe. This friction causes the lymph (fluid containing WBC) to gather between the layers and forming bubbles which we call blisters. Basically, this is bodý reaction to heal the damaged skin. So, as such blister is not a bad thing but what causes a blister is a damage to your skin and that surely can be avoided.
Change in temperature and chemical exposure are other aggravating factors.
But who says blisters cannot be avoided on the trek. Few precautionary measures and feet conditioning tricks can save you from the pain.

Here is how to avoid them:
If you take care all these things below, your chances of having blisters reduce to the minimum.
1. A snug shoe fit
If your shoes fit tightly, you are more prone to get blisters, especially during descent. Make sure your toes have enough room to wiggle when you are choosing your trekking shoes. Typically ‘one finger rule’ works well for trekking shoes. They should not chafe later. You can also try to keep your shoes a bit loose for the descents.
2. Break in your shoes
It is very important to break in your shoes before going on a multi-day trek in case you have purchased new trekking boots. Your feet need some time to get comfortable in the new shoes. Wear them regularly to obtain a regular fit before you start your trek.
3. Keep your feet cool and dry
Remove your shoes and socks whenever you take a halt on the trek. Dry ‘em out. If possible, soak your feet in the water stream. Make sure you dry them before putting on your shoes. Wander around in floaters or crocs instead of shoes after you reach the campsite.

4. Remove dirt and debris
If you get any debris or dirt inside your shoes while walking on the trail, remove it right there, right then. Those are the notorious agents which cause blisters to form.
5. Wear high-ankle, thick socks
Your socks should not be a loose fit. The extra material will only add to friction and more moisture, both of which result into blisters. They should be made with thick material to provide you cushion and warmth. Wear high ankle socks to prevent your feet from the abrasion. You can also opt for toe socks, if possible. They may look funny, but at least, they prevent skin-on-skin rubbing.
6. Alternate your socks every day
Depending on the days and terrain of the trek, change your socks daily. You can wash one pair at the water source and dry them on your backpack while walking while you wear the other one. Keep an extra pair if washing and drying are an issue. This way you can maintain feet hygiene on the trek.
7. Avoid sweaty feet
If your feet sweat too much, dust them with some powder before you wear shoes. The talc seems to prevent the stench and moisture buildup.

Treating the blisters:
Treat “Hot-spots”
Hot-spot is a pre-blister state characterized by reddened skin and hot sensation in that area. This sensory warning provides you a tiny window to nip in the bud before the situation aggravates.
- Apply petroleum jelly or aloe vera gel to a hot spot to reduce friction. You can also sprinkle some foot powder.
- Put a band-aid or a tape to prevent it from turning into a blister later in the day.
For blisters:
If your blister is small and not painful, it is better to leave them alone. Don’t prick them since the blister's own skin is the best protection against it.
If the blister has broken, it should be cleaned, disinfected, and, bandaged. Clean the infected area with hand sanitizer to disinfect it. Apply an antibiotic ointment over the blister and cover it with an adhesive bandage.

If your blister is painful and has not broken yet, prick it with a needle. Use the following steps to treat the blisters:
- Swab the blister with alcohol to disinfect the area.
- Using your fingers, push the fluid to one side of the blister.
- Prick the side with the fluid using a needle that has been sterilized by alcohol, a lighted match or in boiling water.
- The needle should prick the blister horizontally at the point where the blister begins to rise above the skin.
- Leave the skin overlying the blister in place to prevent infection.
- Apply antibiotic gel to the site of the needle pricks and cover with a porous, plastic-coated gauze pad that will absorb any further drainage and allow the blister to breathe and dry out.
Make sure you carry a first-aid kit equipped with everything you will require to treat the blisters on the trail if the need arises- Antibiotic gel, Porous bandage, Dettol, cotton swabs, sterilized needle.
Now that you know how to avoid blisters and treat the same should you have them during a trek, you are ready to start trekking in the mountains. Click here to explore our activity page to join us for a trek you wish to undertake.


